


 Back to index
WooCommerce plugin for ecommerce platforms
Using our WooCommerce plugin you can issue and submit invoices for your online store orders.
Download the plugin following the steps:
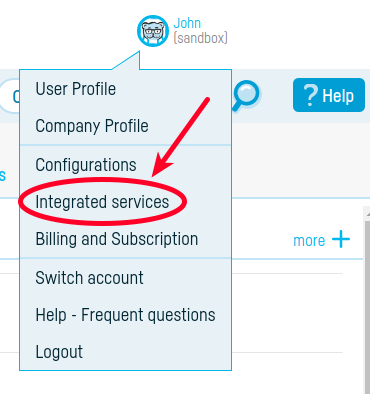
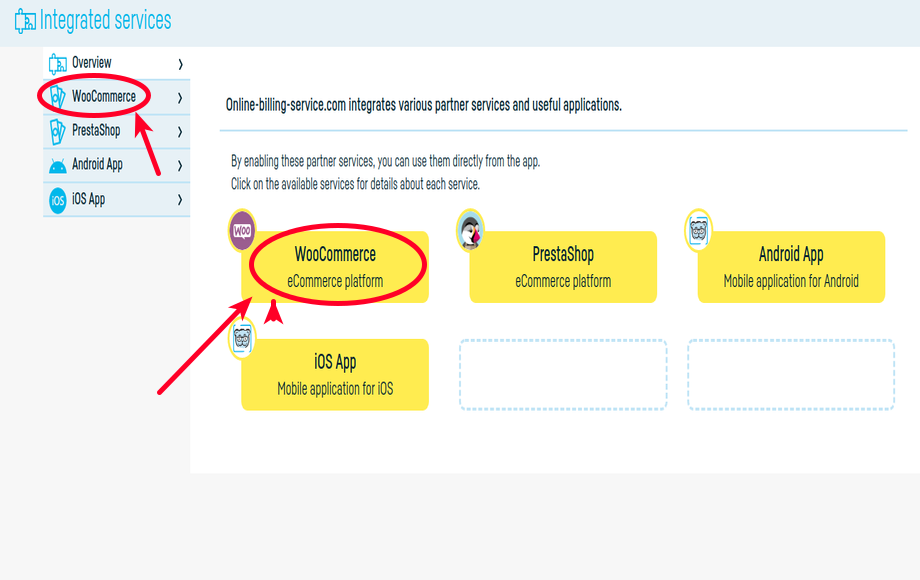
Then go to 'Overview' and click on 'WooCommerce eCommerce platform'
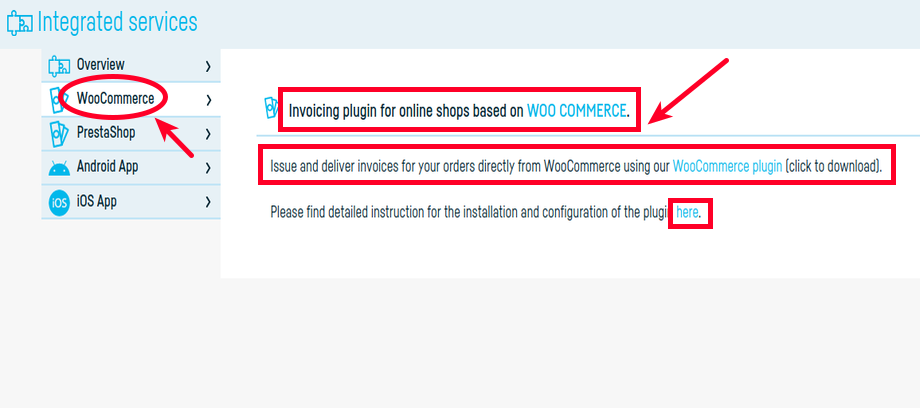
In the new opened page click on the blue text 'WooCommerce plugin'
After installing WordPress and the WooCommerce module, you can add the F4 plugin from the WordPress admin interface, specifically in Plugins > Add New. Click on ‘Upload Plugin’ then ‘Choose File’ where we select the file with the zip extension as in the following image:
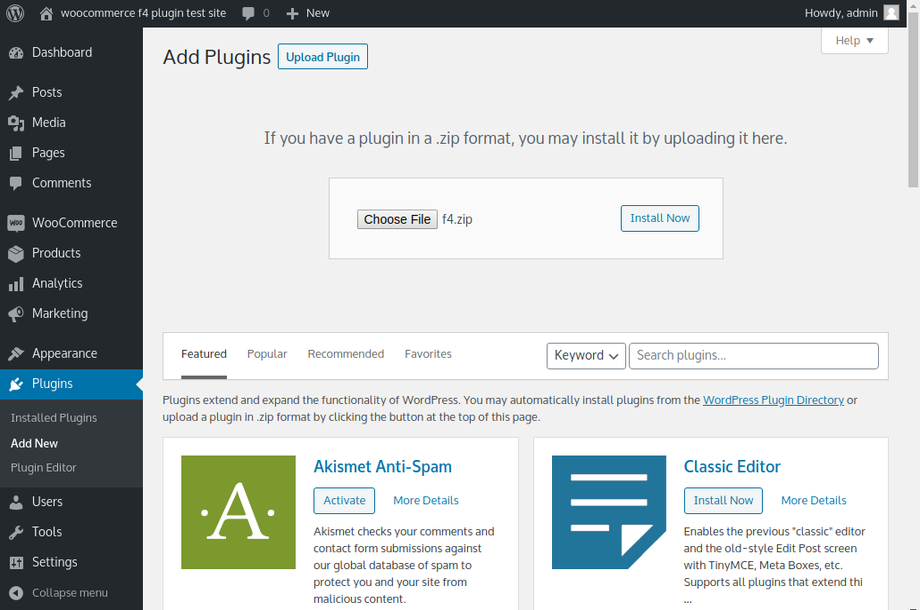
Click ‘Install Now’ then ‘Activate Plugin’.
If you want to install the plugin using an FTP client or test it on localhost, you can install it by following the steps:
- Unzip the file with the zip extension
- You connect to the server using an FTP client
- Browse to the folder where you installed WordPress and then to the wp-content / plugins folder and upload the contents of the file with the zip extension
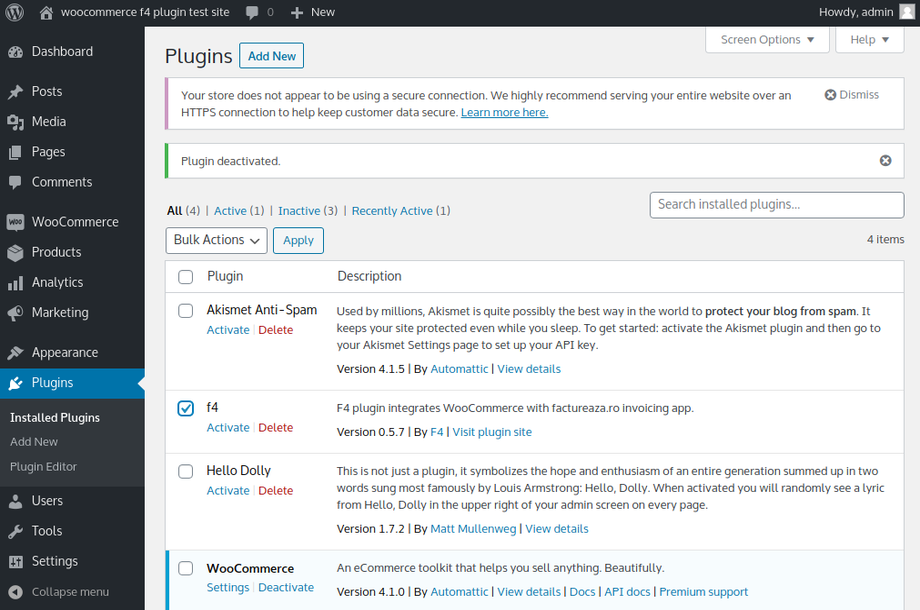
- In the WordPress admin interface, click Plugins> Installed Plugins and click ‘Activate’.
5. Using the plugin (configuring, authenticating and issuing invoices)
After installing the plugin on the right side, the plugin name will appear in the navigation bar. If you click on it youwill be able to login with an API key generated from the online-billing-service.com application from ‘User profile’, the ‘API Key’ tab, then click on the green button ‘Generate a key’.

Now you can copy the generated API key and use it for authentication in the WooCommerce plugin.
In the Settings tab of the F4 plugin you must specify the series of invoices (existing in the billing application) by prefix and suffix, and the year will be set by default.
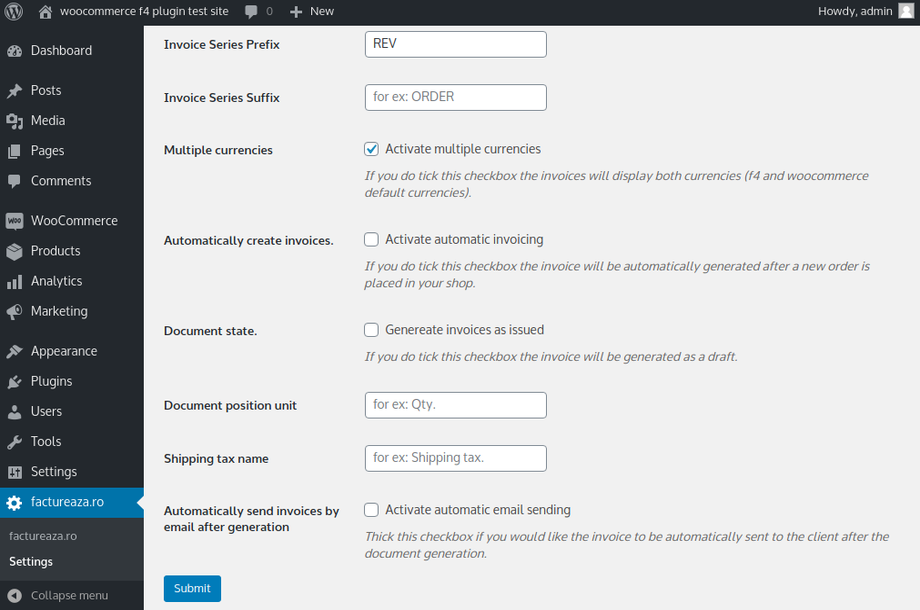
You can check or uncheck the following checkboxes depending on your preferences. If, for example, you want the invoice to be automatically invoiced after each order, check the first box, and if you want to send the invoice generated in the invoice by e-mail, tick the second box.
If you do not choose to generate the invoices automatically, there are two options::
- you can generate the invoice for each order
- you can select multiple orders for which we will generate invoices from the WooCommerce orders tab
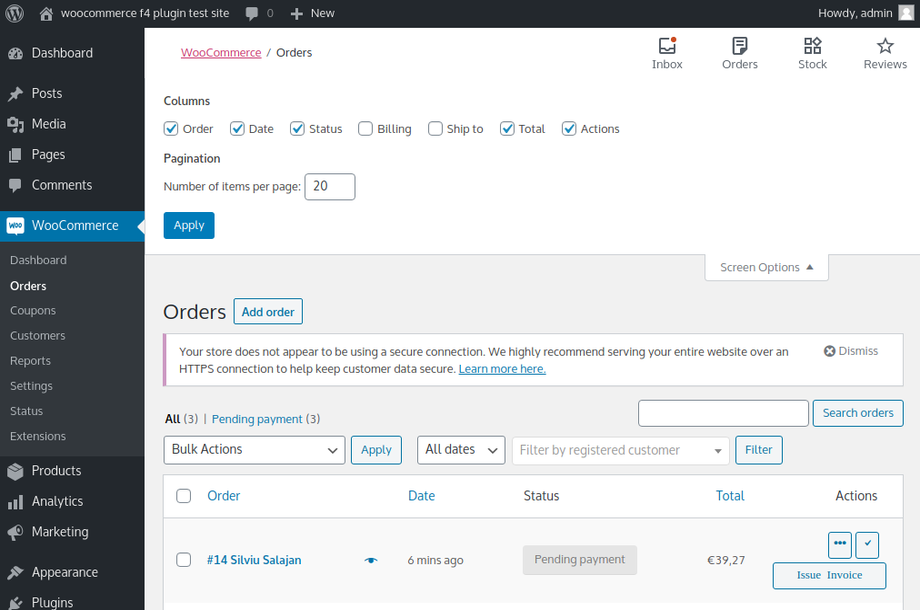
In order to generate invoices, for each order you have to activate from the screen options the action column as in the following image, and then the button for generating invoices will be visible.
To generate invoices for multiple orders, you can select the orders and go to Bulk Actions where you select ‘Generate Invoices’, then click ‘Apply’.

After generating the invoices, these will be visible in the F4> F4 tab (where we initially logged in) as links to online-billing-service.com application.
!!! IMPORTANT !!!
For the proper functioning of the WooCommerce module, it is important to meet the following conditions:
- the minimum required version of wordpress is 4.7.0
- the minimum required WooCommerce version is 3.0.0.
How can I include VAT on the invoice?
To include VAT on your invoice you have to add a new tax on woocommerce, and this will be taken in our plugin as VAT.
To add a new fee follow the steps in the woocommerce documentation https://docs.
Keep up the good work!
Back to index