


 Back to index
How to import work logs from Excel
The Work Logs option is useful for anyone who issues invoices based on worked hours (for example, billing clients for consultancy or maintenance hours).
And if you manage a larger team or if you work on multiple projects simultaneously, you can easily generate work logs using an Excel import.
Instead of clicking on "Add Work Log" for each activity you want to track, it's much simpler to fill out a table with all the activities and then, with a few clicks, automatically generate the work log entries in the application.
Learn how to import work logs from Excel.
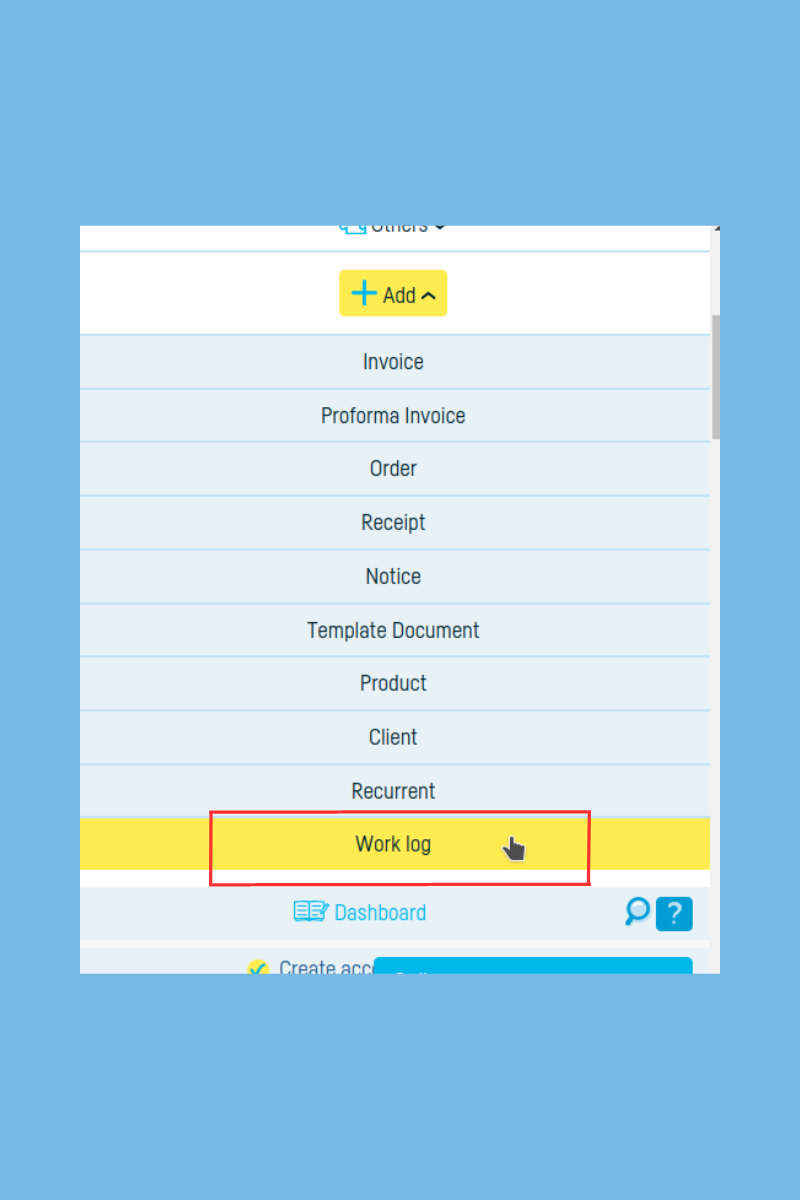
Step 1 - From the Add menu, click on the Work Log submenu.
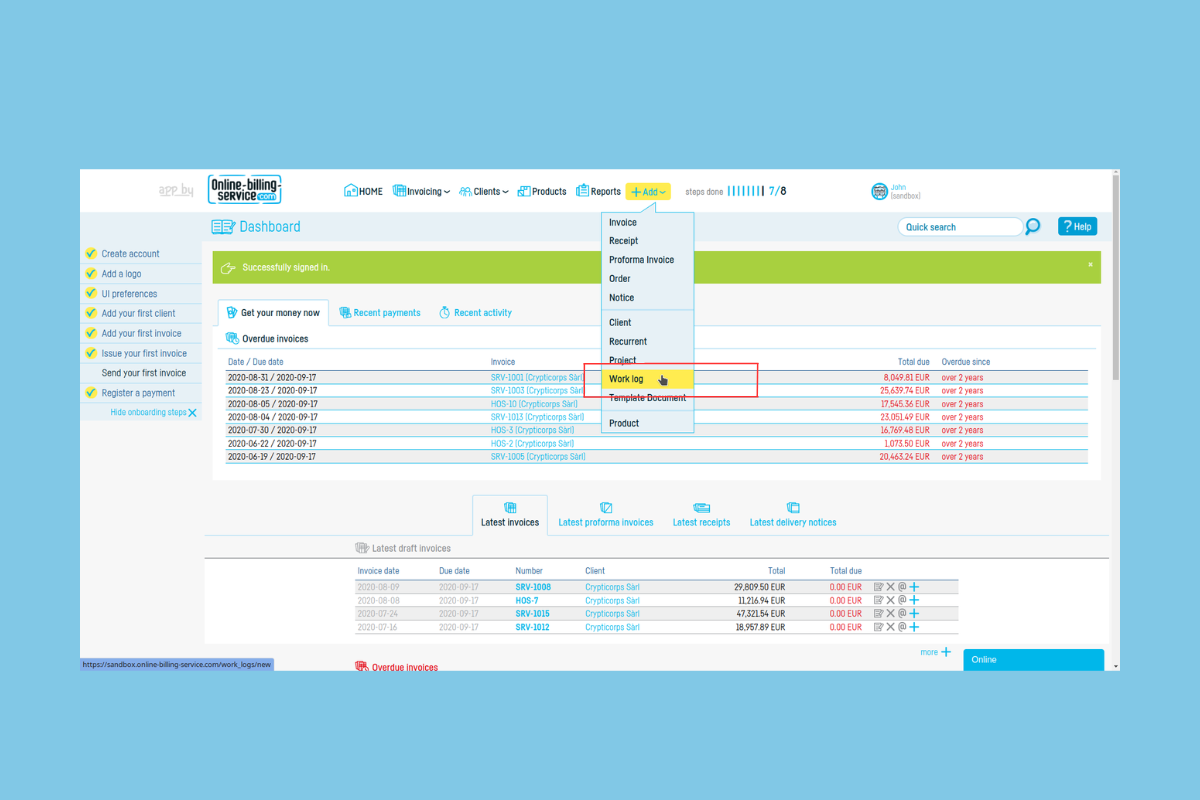
To add a new work log entry, you first need to define the project to which you will associate this entry. If you haven't already created the project, learn how to do this here.
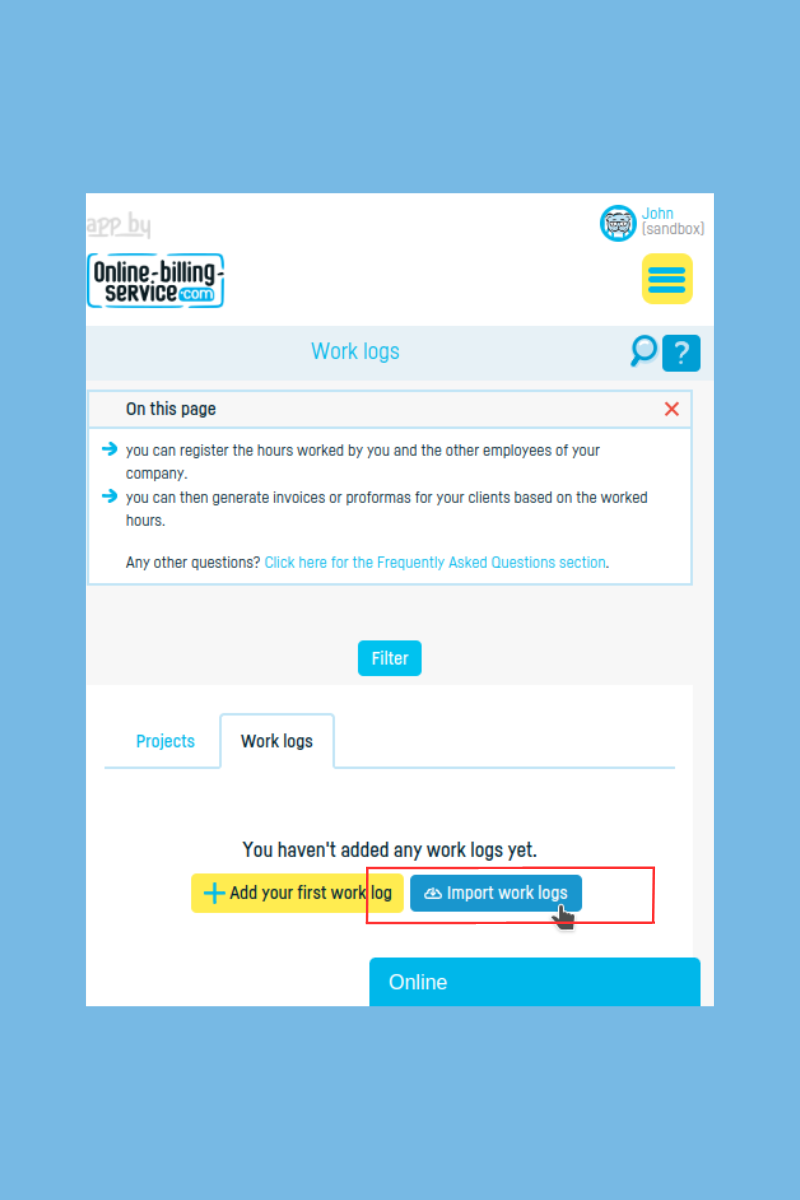
Step 2 - Click on the Import work logs button.

Step 3 - Create the file for import.
Important: You cannot enter work logs for a person who does not have a user account. Therefore, whether you are tracking your own hours or those of another colleague, the person for whom you enter the work logs must be defined as a user. Learn how to do this here.
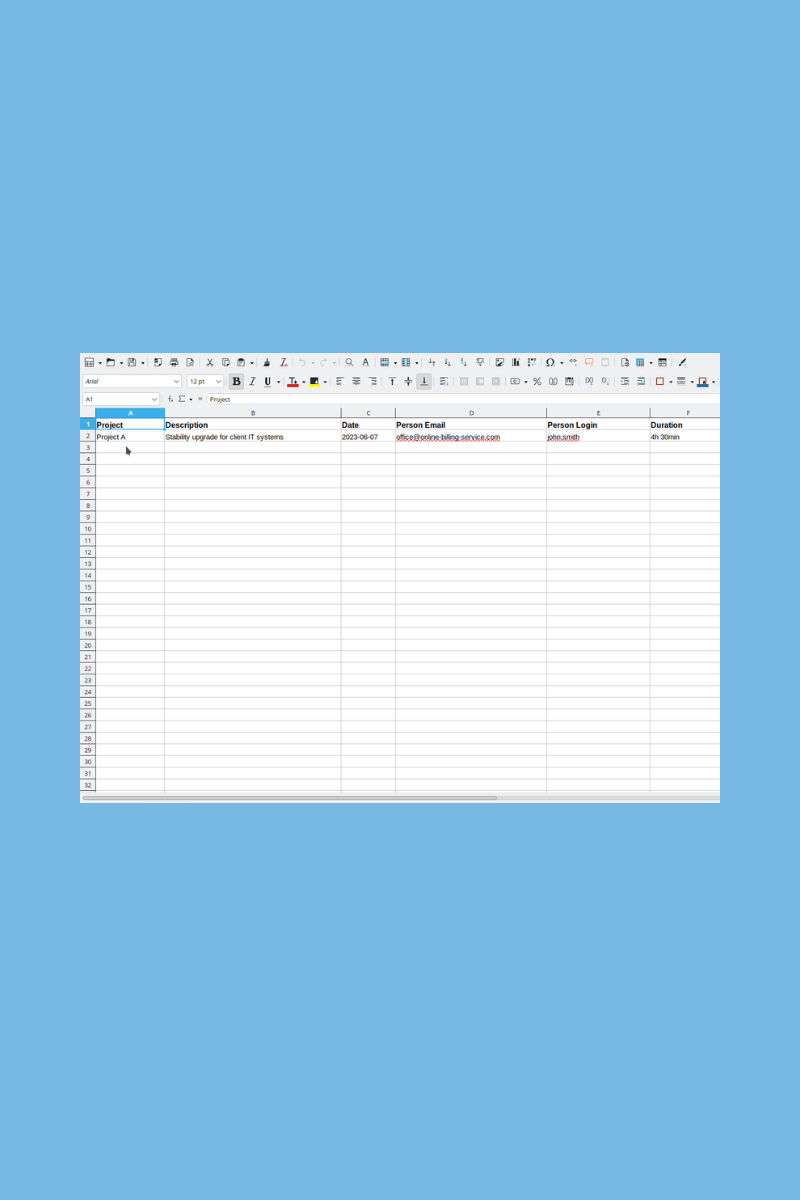
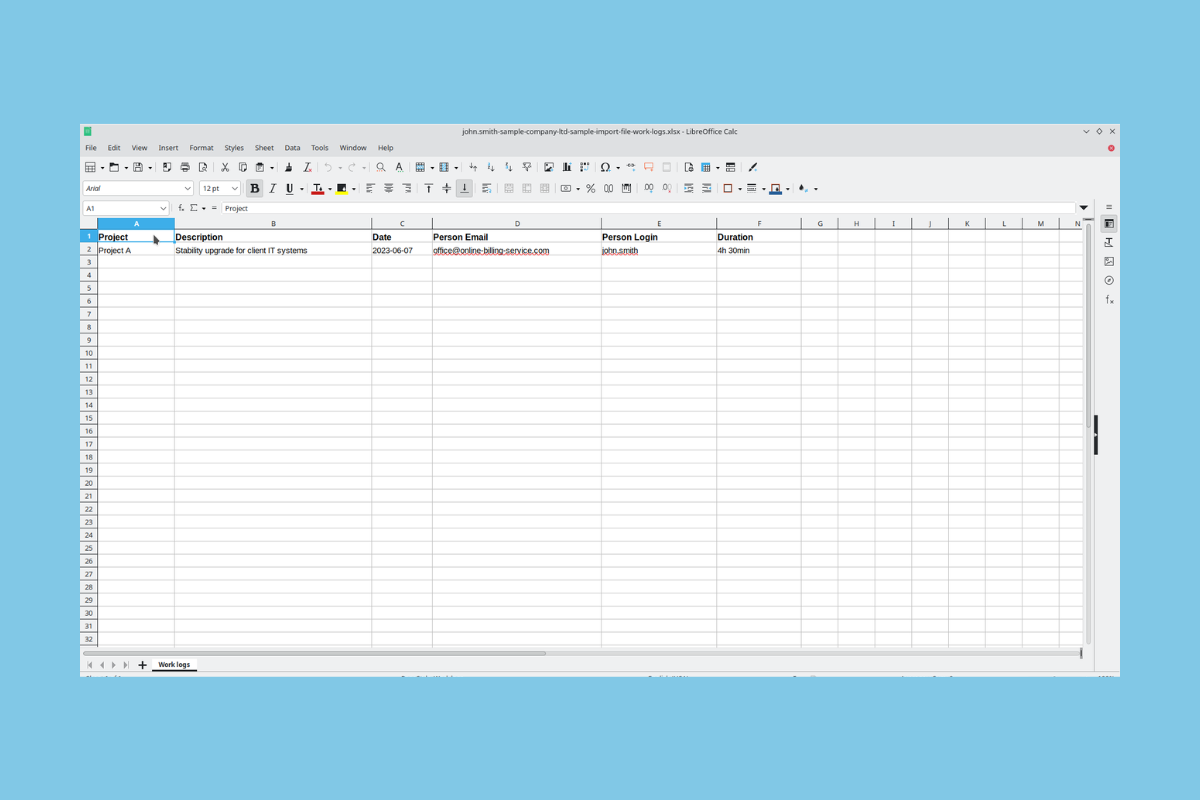
The import file can contain the following columns:
Project: Fill in the project name as you defined it in the Projects submenu of your account.
Description: Fill in the activity you performed within the project.
Date: Fill in the day on which you performed the respective activity.
User Email: Fill in the user email of the person for whom you are entering the work log.
User Login: Fill in the username of the person for whom you are entering the work log.
Duration: Fill in the time worked by the respective person.
In the same import file, you can enter activities for any of your users and for any of the projects you have defined. And you can have as many activities (rows in the table) as you want.
You can use an import file created by yourself. Name each column header with the term that describes the content of the column, then fill in each cell with the relevant information. The program will automatically identify the column headers and generate the work logs. If the app does not correctly recognize a column header, you can manually correct it after the import.
If you want to have no doubts and ensure that all table headers are correctly recognized, the easiest way is to use our import file template.
This is what an import file template looks like:
After you have filled in and saved the import file locally (on your computer, tablet, or phone), you are ready to proceed with the actual import.
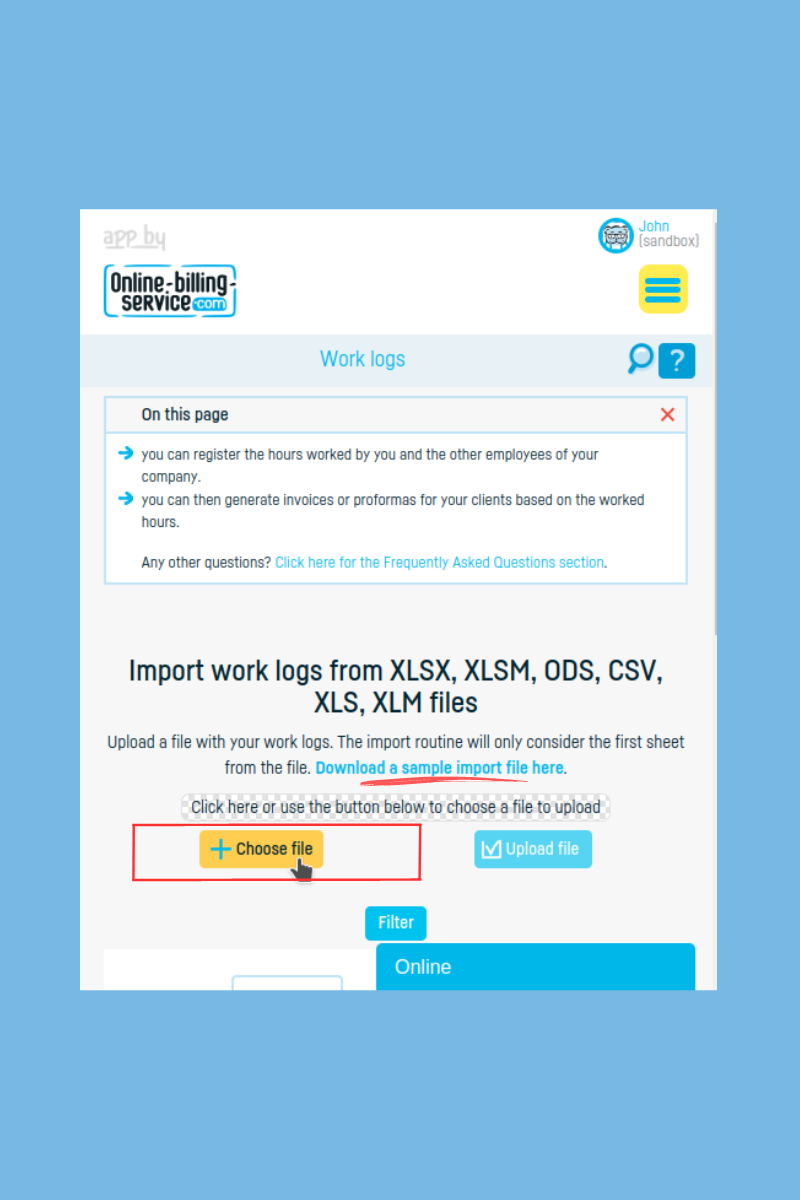
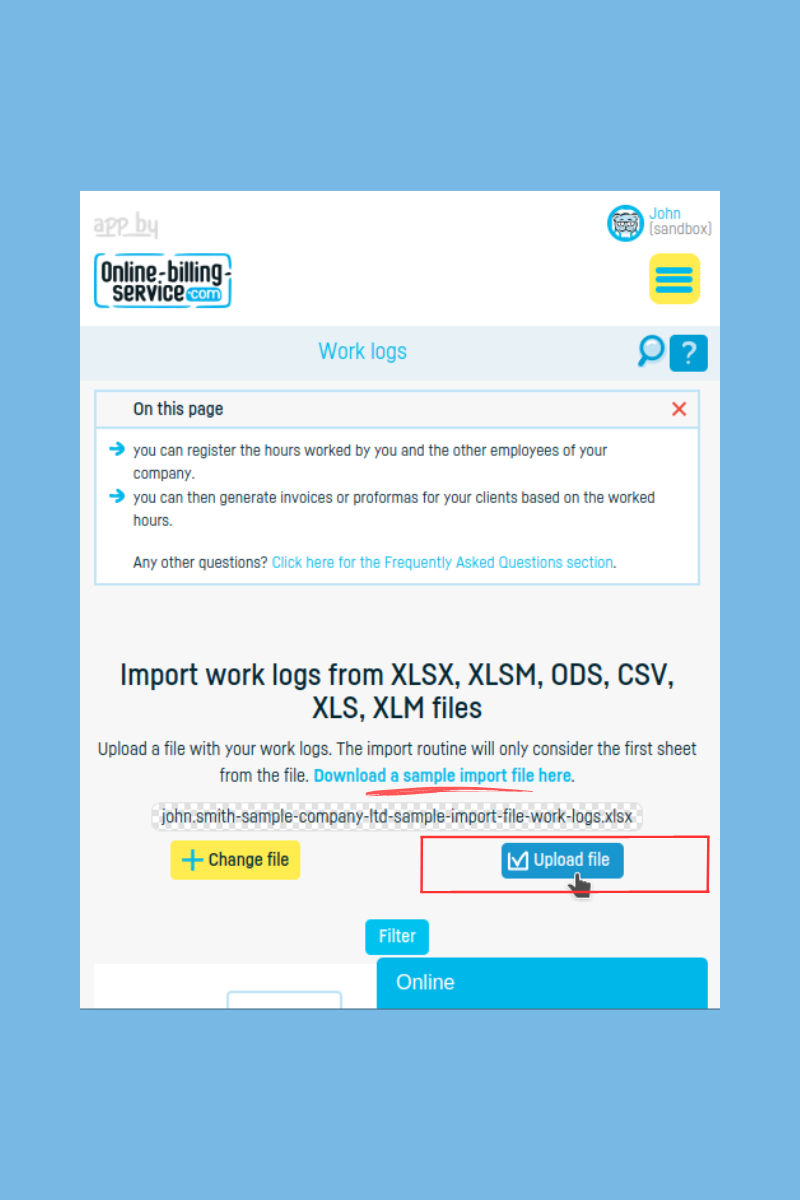
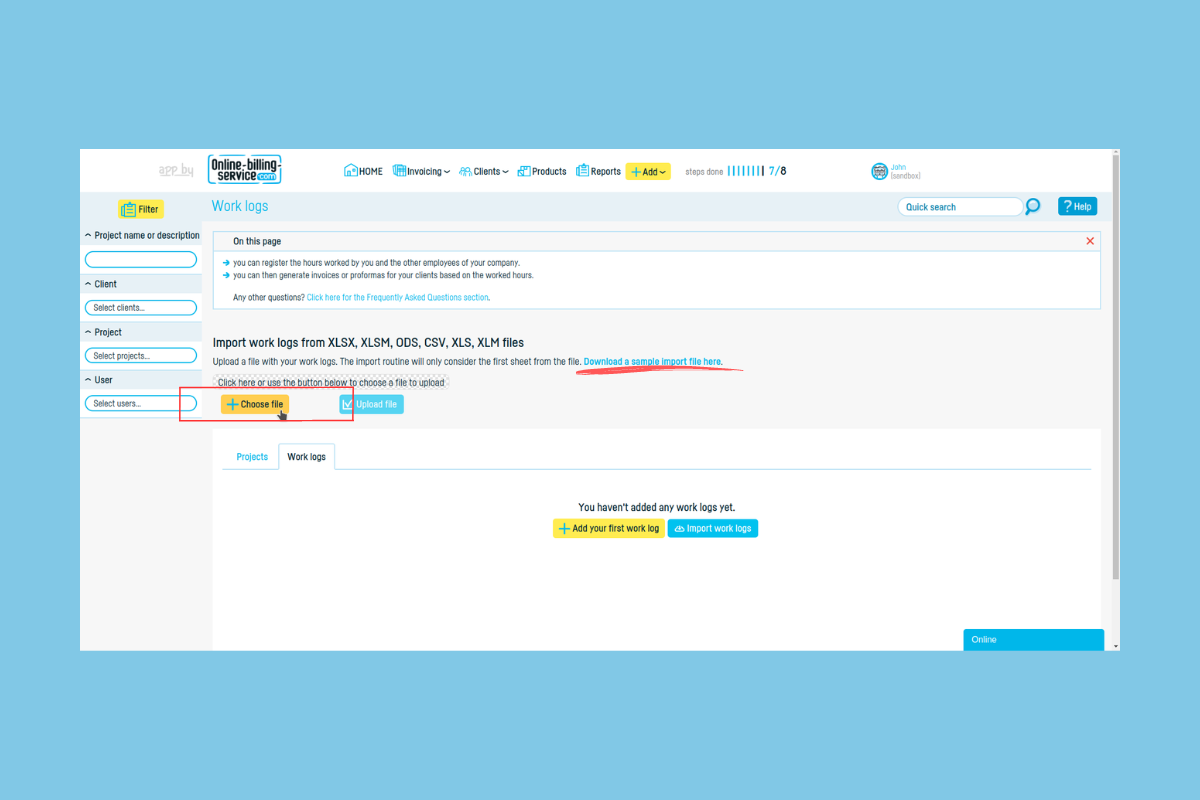
Step 4 - Click on Choose File.
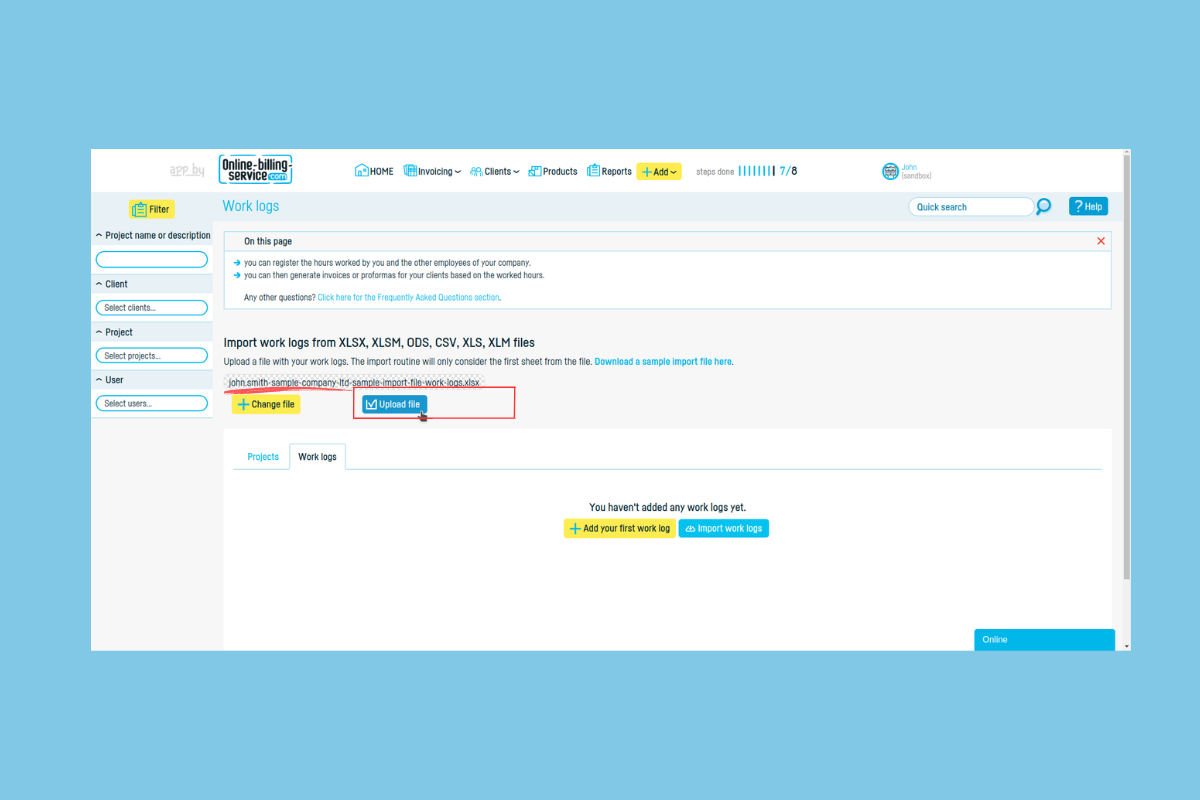
Step 5 - The name you gave to the file will appear in the gray box. Click on Upload File.
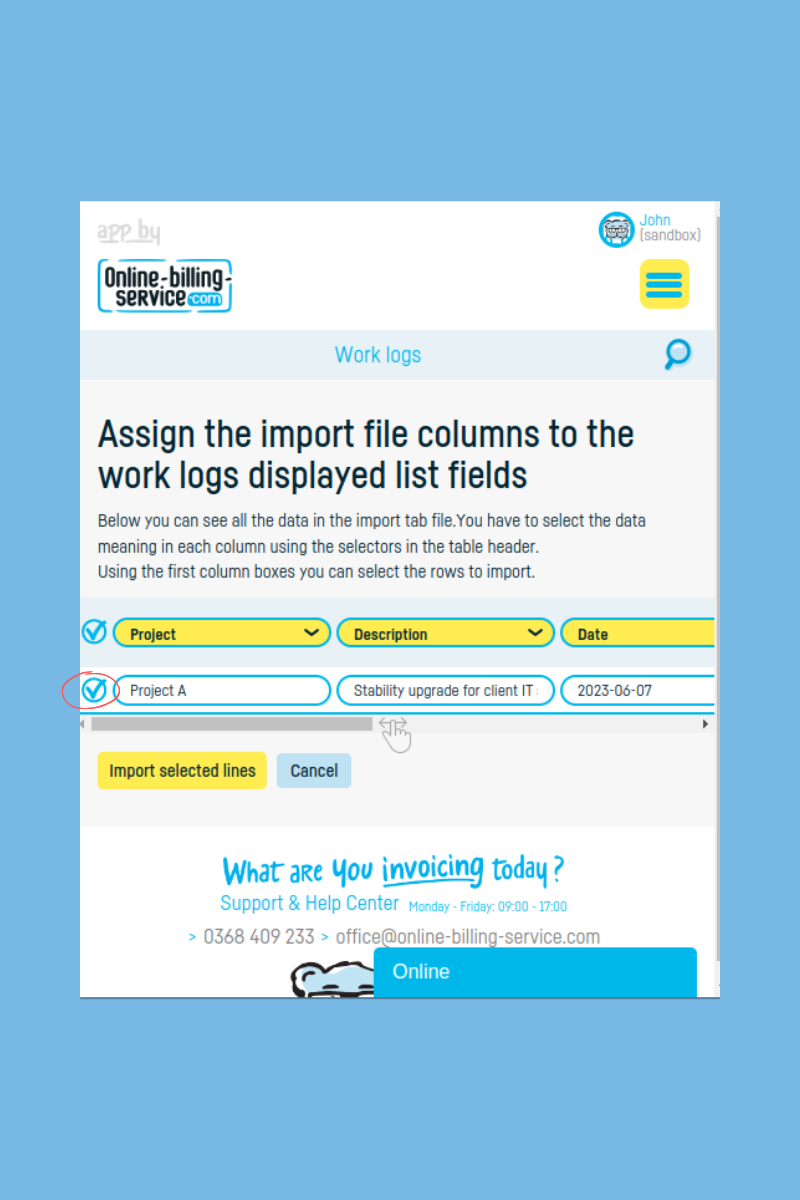
Now, all the lines from the import file will appear in the application. If you want to make any changes, edit the respective cells directly.
If you want to remove a specific line from the work log, uncheck the box on the left.
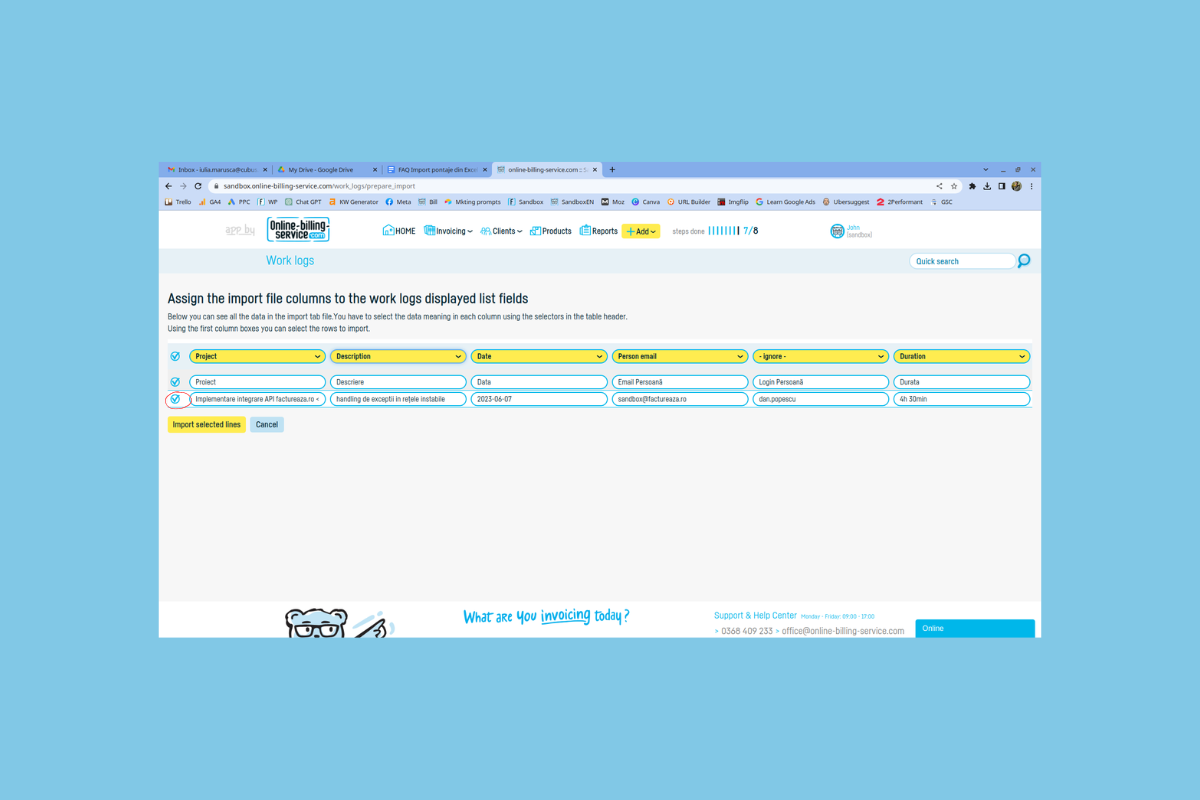
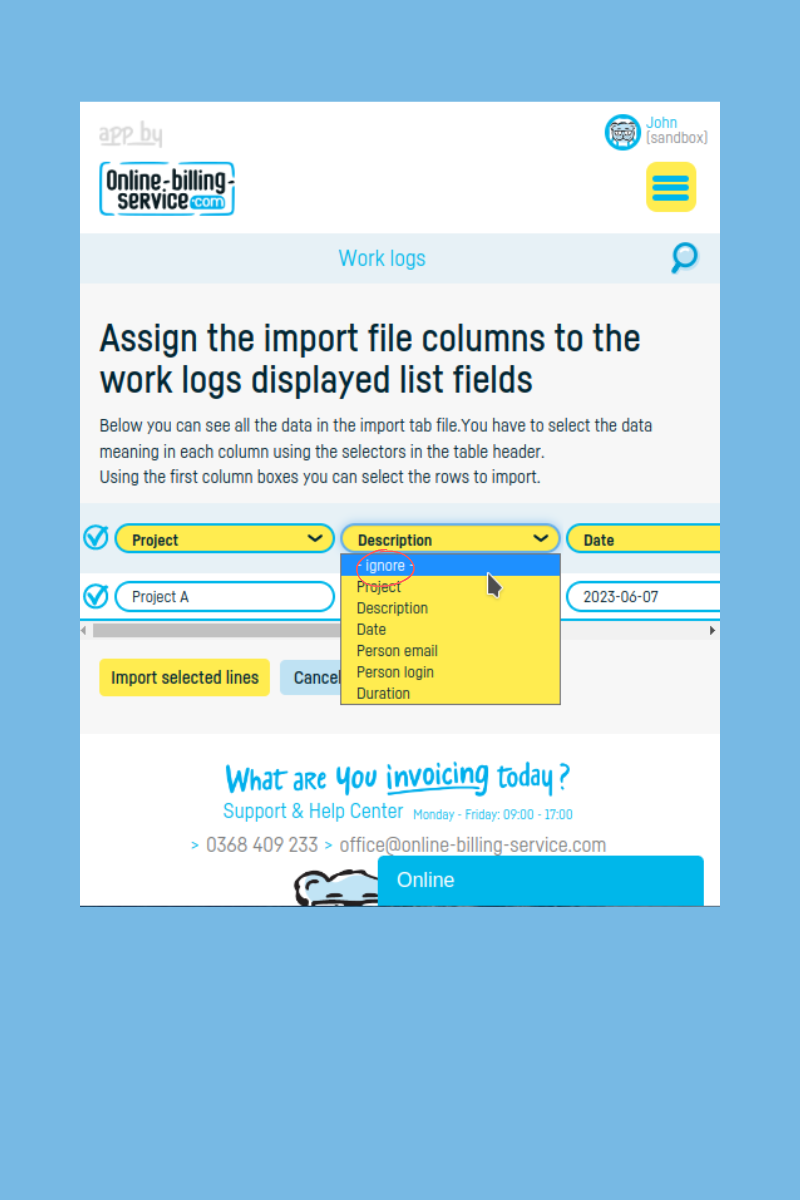
If you want to exclude a specific column from the work log, select Ignore.
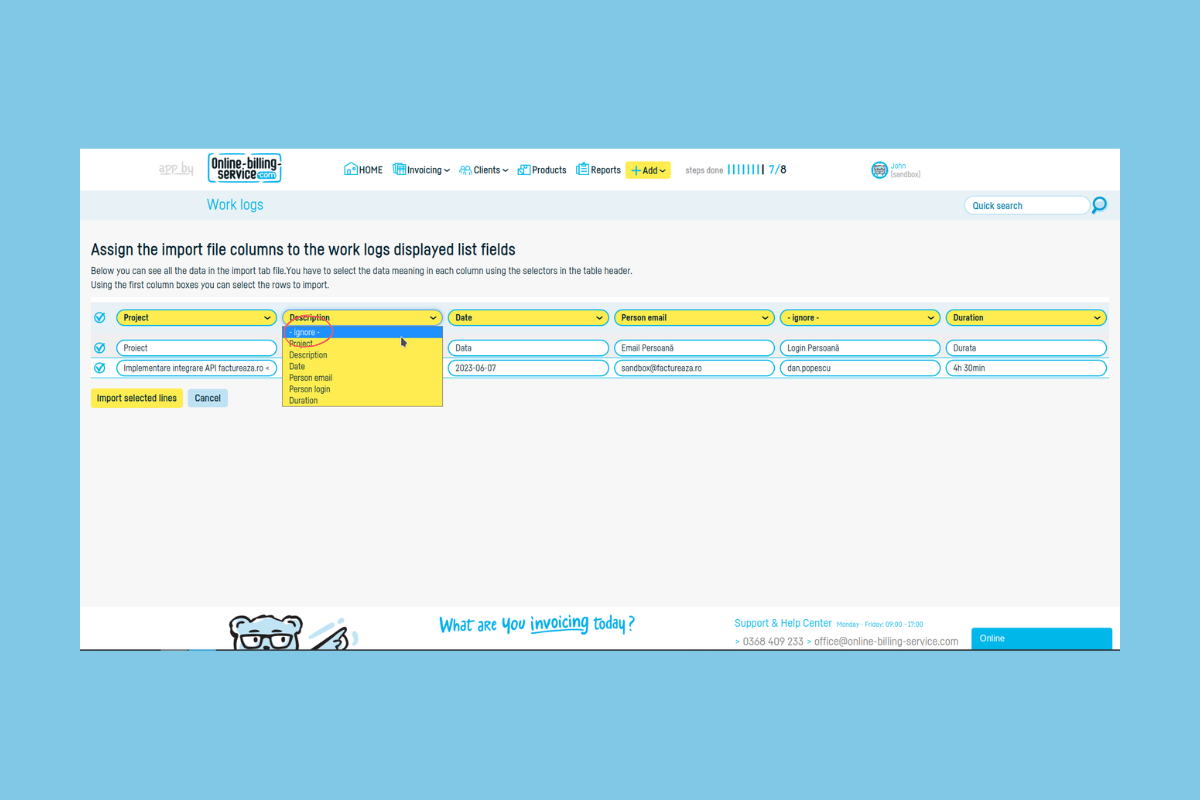
If there are multiple issues and you want to redo the work logs import file, click on Cancel.
Step 6 - If you have checked and all the information is correct, click on Import Selected Lines.
That's it. Now you can issue invoices from the imported work log entries. Learn how to do this here.
Back to index