 Back to index
How to Add and Customize a Order (for Sales or Purchases)
The Orders section on online-billing-service.com is highly versatile. Not only does it allow you to generate both sales and purchase documents, but it also provides you with a diverse range of titles or designations.
For sales documents, you can choose any of the following titles:
– Order
– Client Order
– Sales Order
– Offer
– Price Offer
– Payment Request
– Payment Reminder
– Payment Notification
For the issuer, you have the following designations available:
– Seller
– Provider
– Distributor
– Producer
– Offeror
– From
And for the recipient:
– Client
– Buyer
– Purchaser
– Consumer
– Investor
– User
– To
For purchase documents, the available titles are:
– Order
– Client Order
– Purchase Order
– Acquisition Order
– Stock Order
– Price Request
– Purchase Request
For the issuer, you have the following designations available:
– From
– Investor
– User
– Consumer
And for the recipient:
– To
We encourage you to explore the options in the Orders section. They will greatly simplify your procurement procedures, as well as your quoting process.
Orders can also be useful if, for example, you own properties for rent and need to quickly issue payment notifications.
You can also use them to place stock orders or generate order forms for your customers.
You can streamline and enhance the orders or quotes you send out by adding attachments ( read here how to add attachments to documents). This means that when you send an order or a quote from the application, the email sent to the recipient can contain other complementary documents such as product catalogs, technical specifications, user manuals, etc.
So, whether you're in the role of a customer or a supplier, use the Orders section to issue a variety of documents.
Here are the steps:
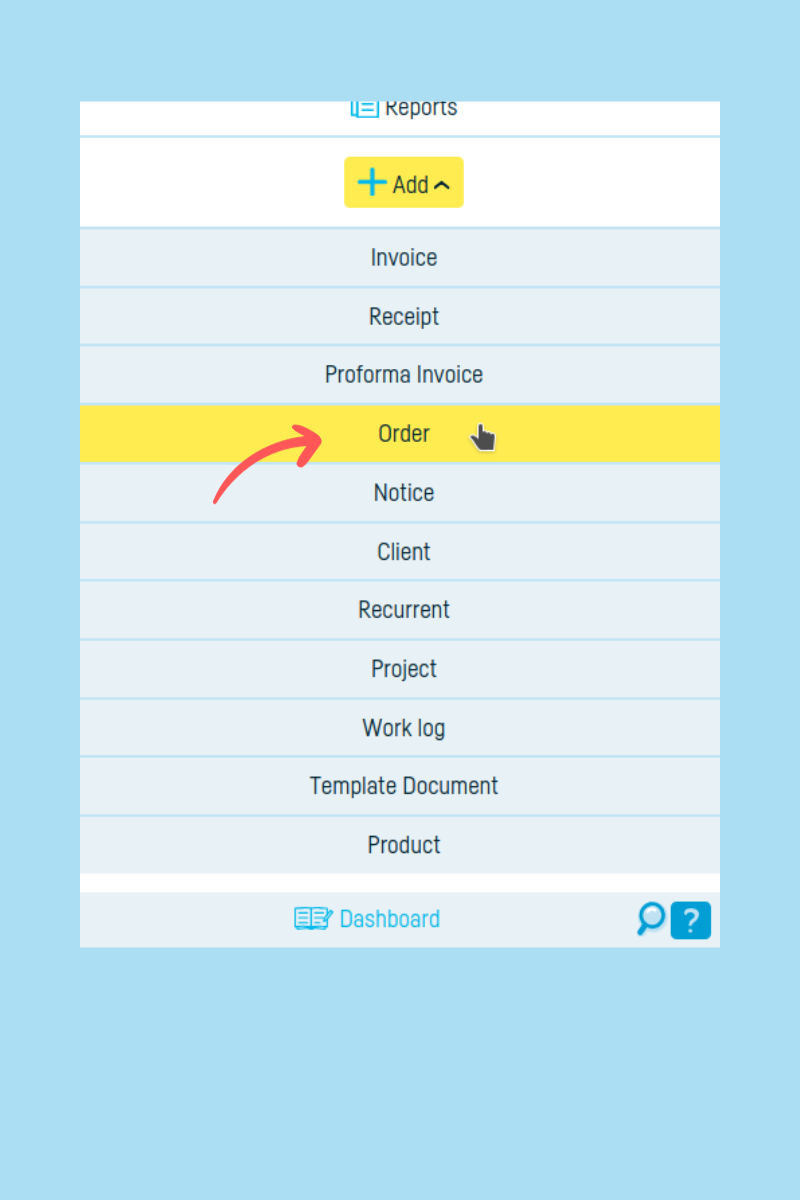
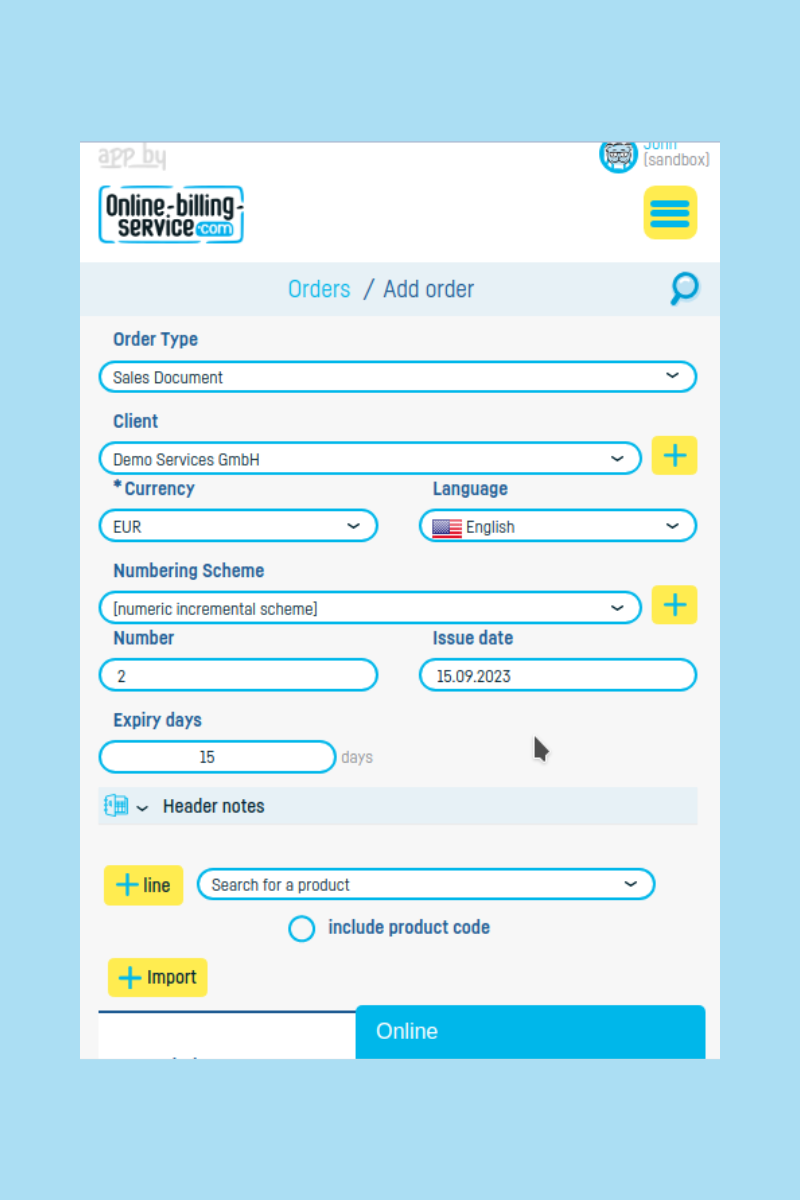
Step 1. Click on Add Order
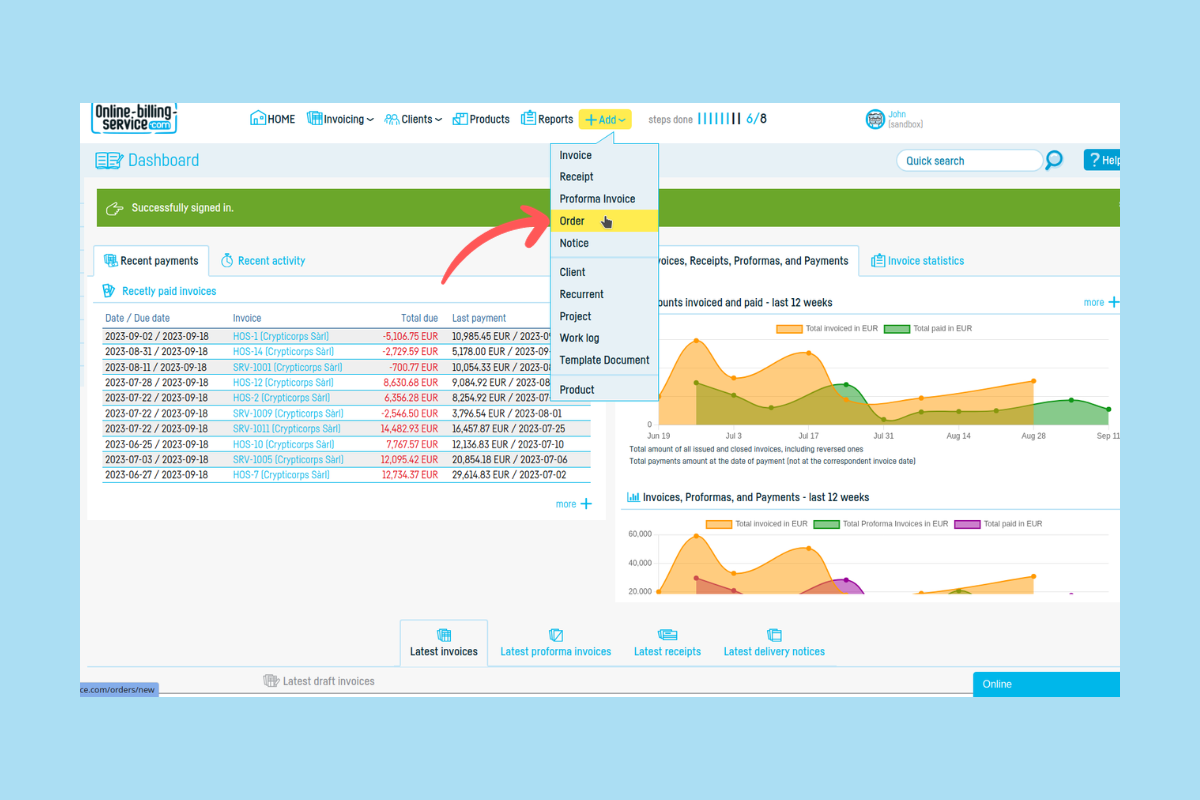
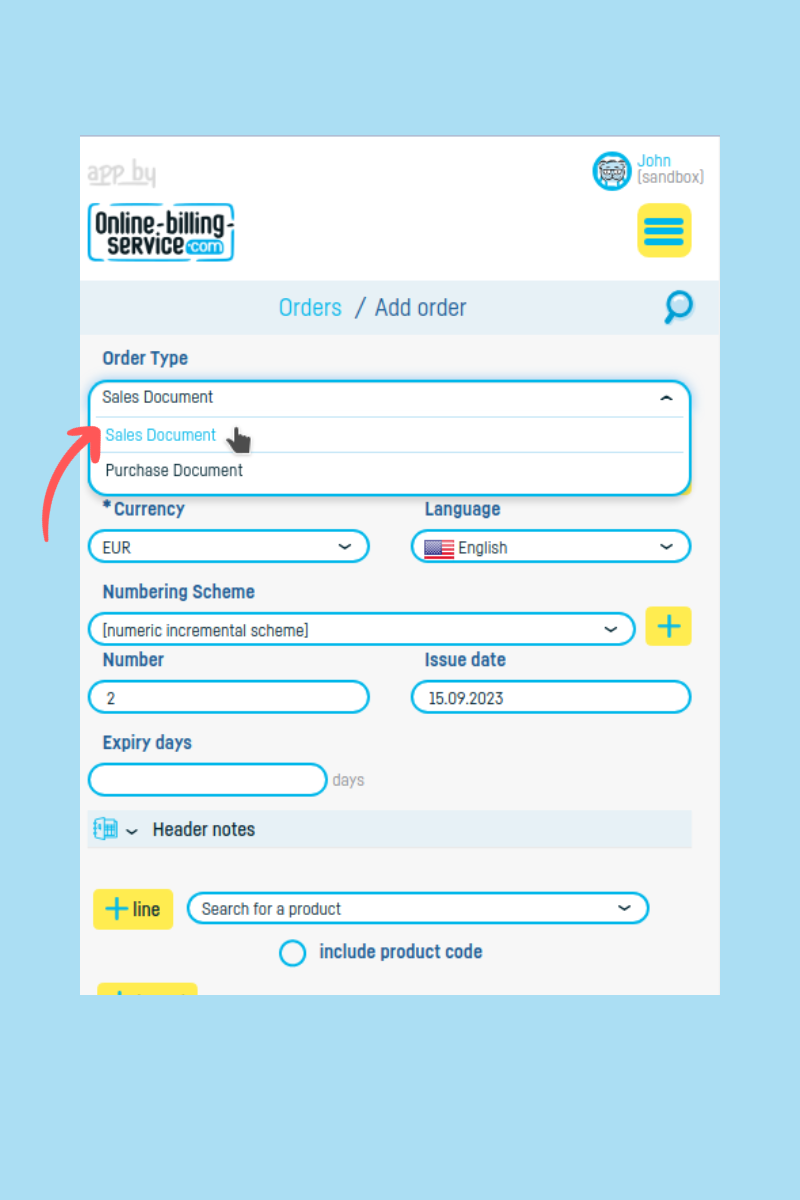
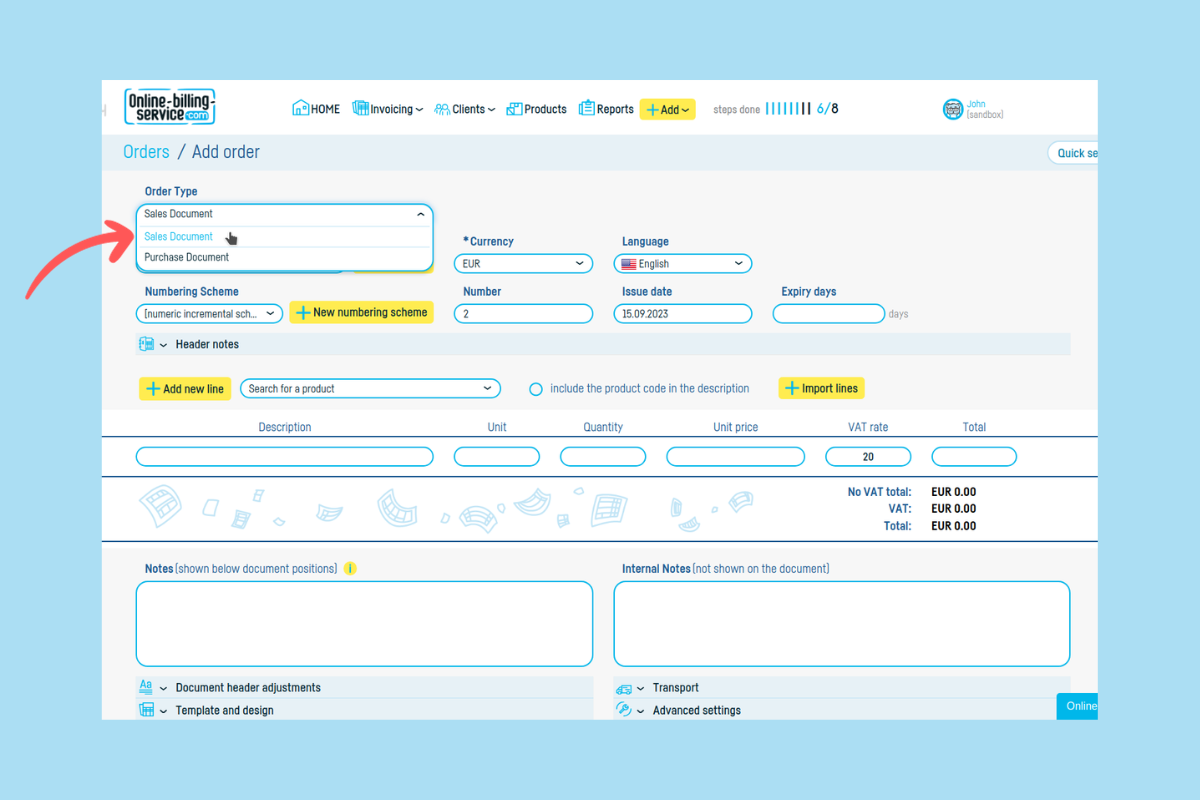
Step 2. Choose the order type
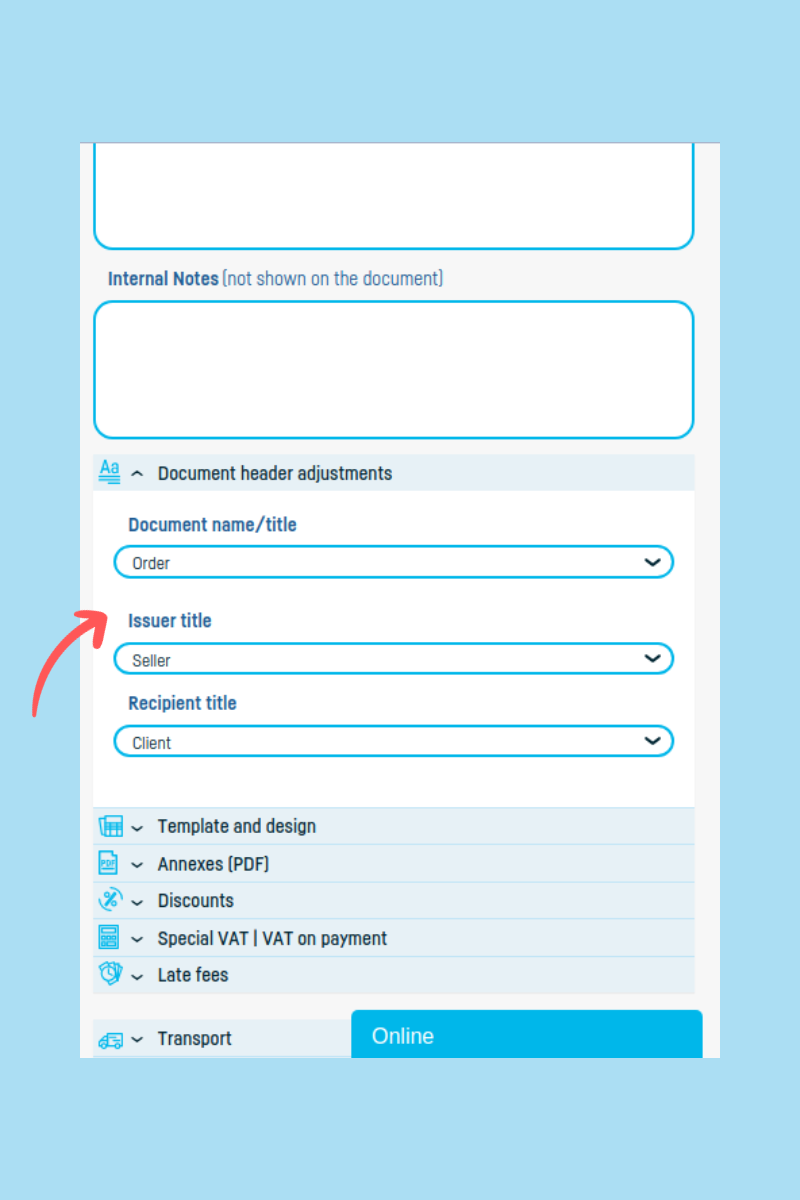
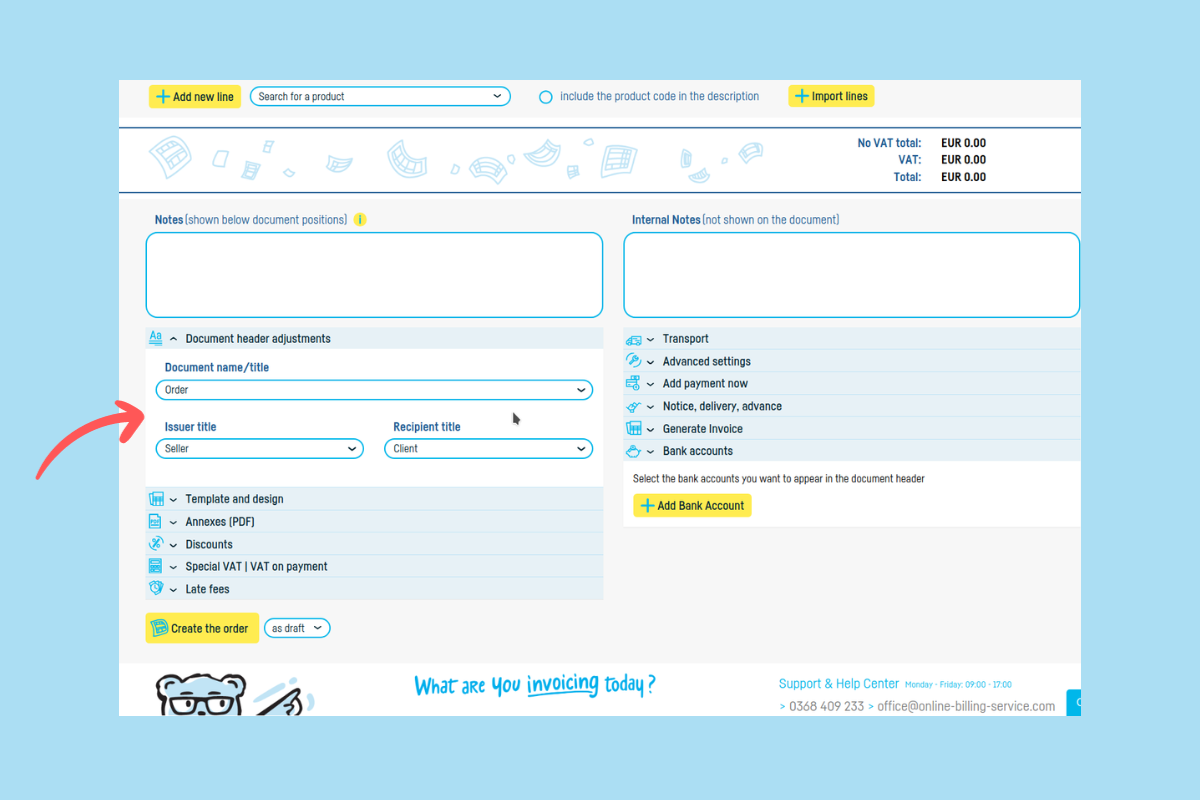
Step 3. Select the document title and the issuer's and recipient's titles.
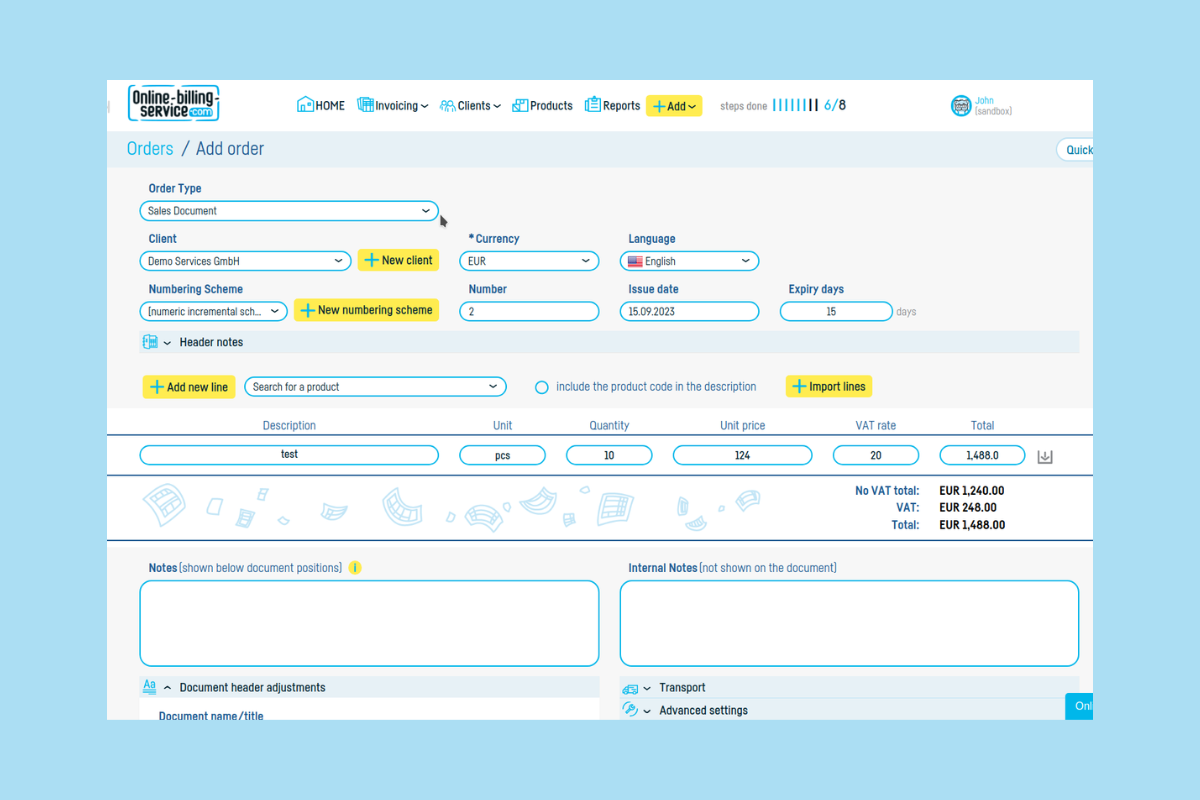
Step 4. Fill in the document with relevant details
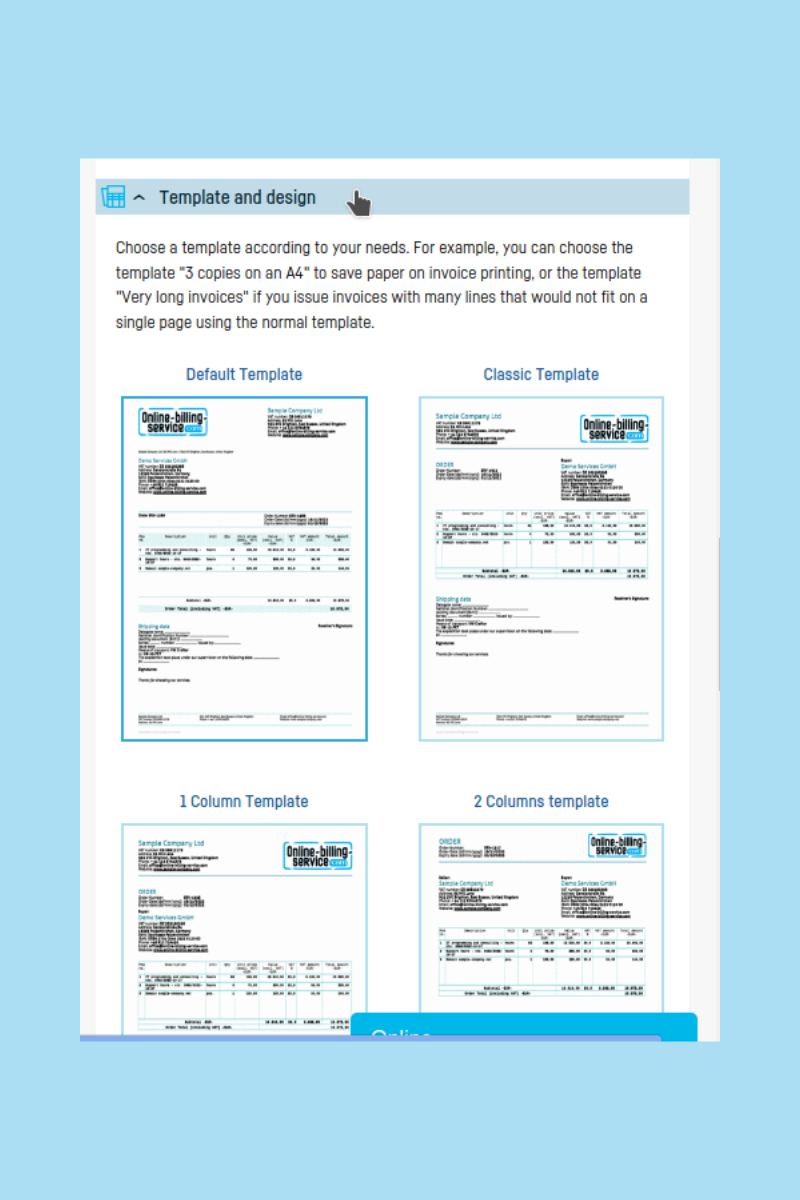
Step 5. If desired, you can change the document's design.
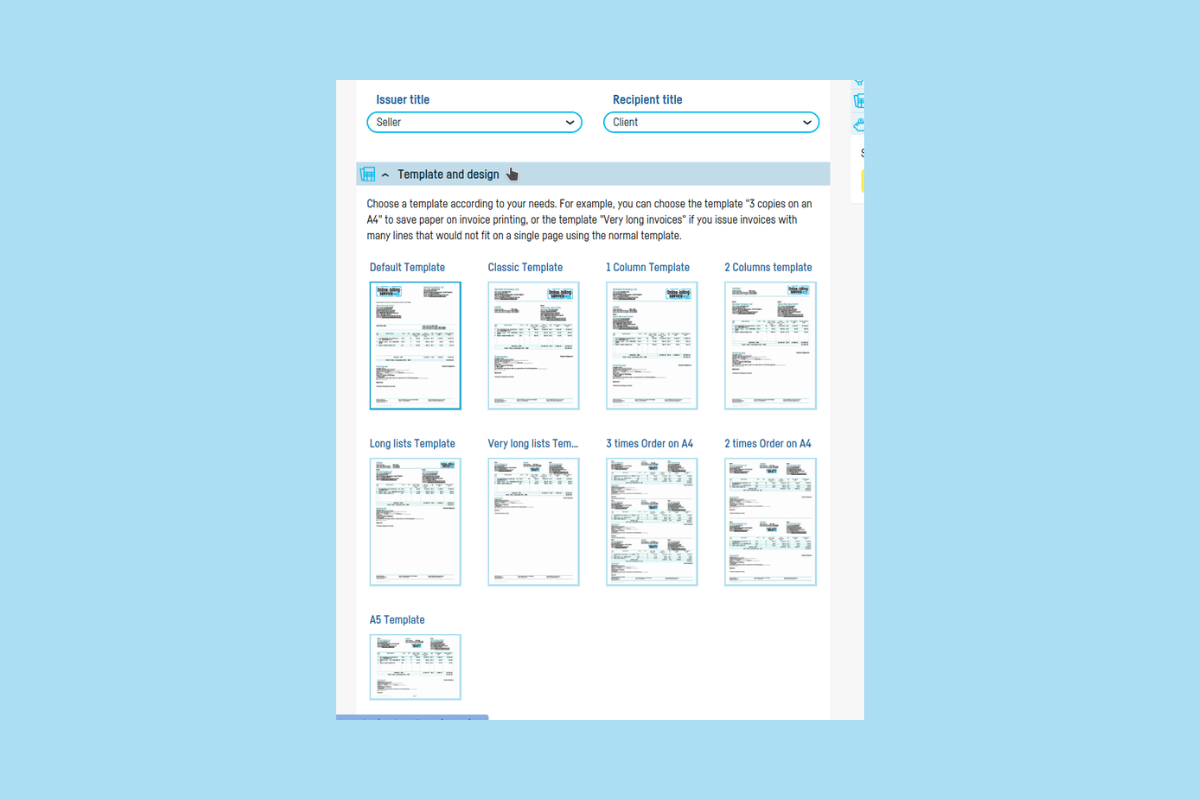
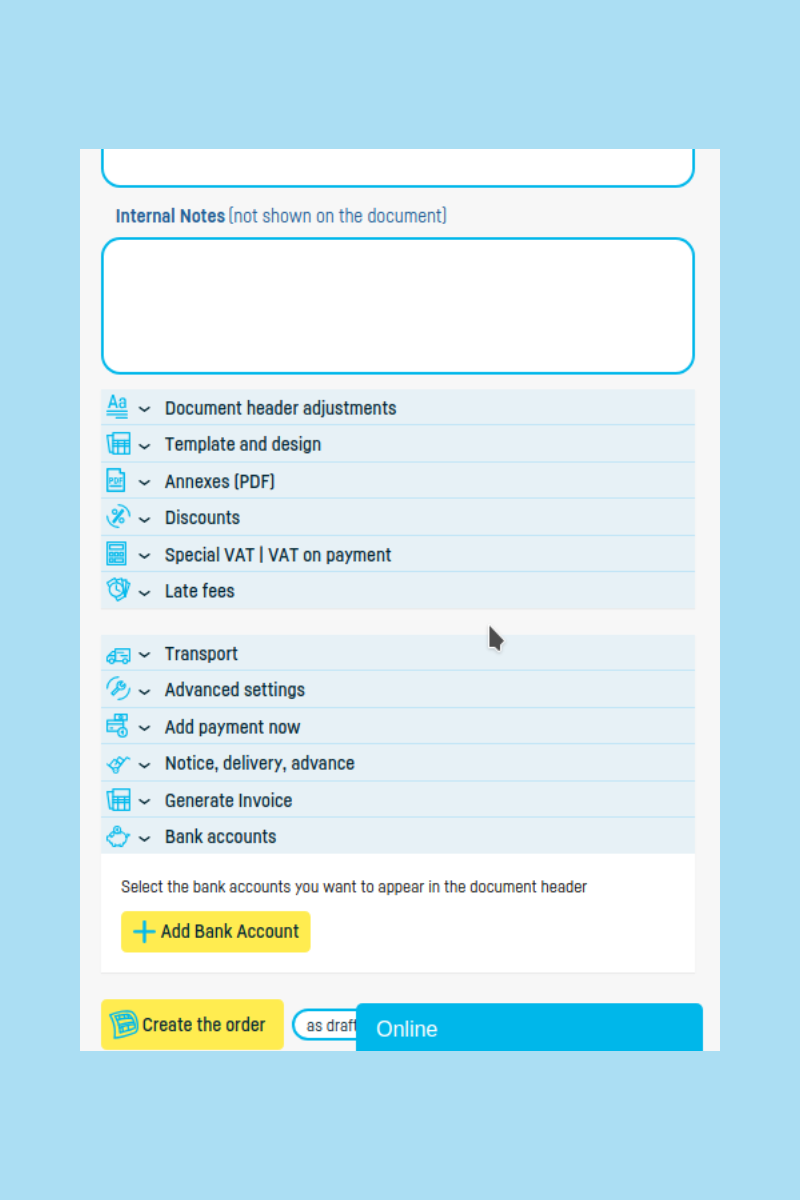
Step 6. Review all other document options and click on the name of an option if you want to use it.
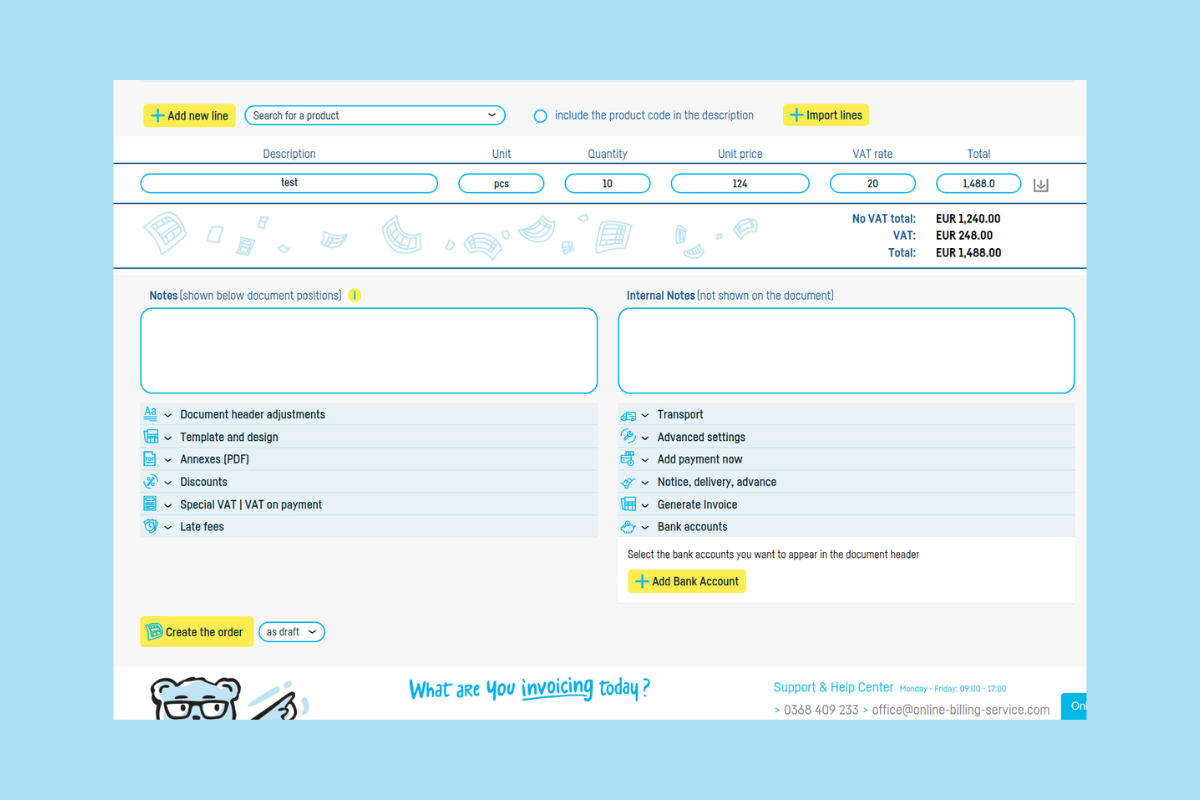
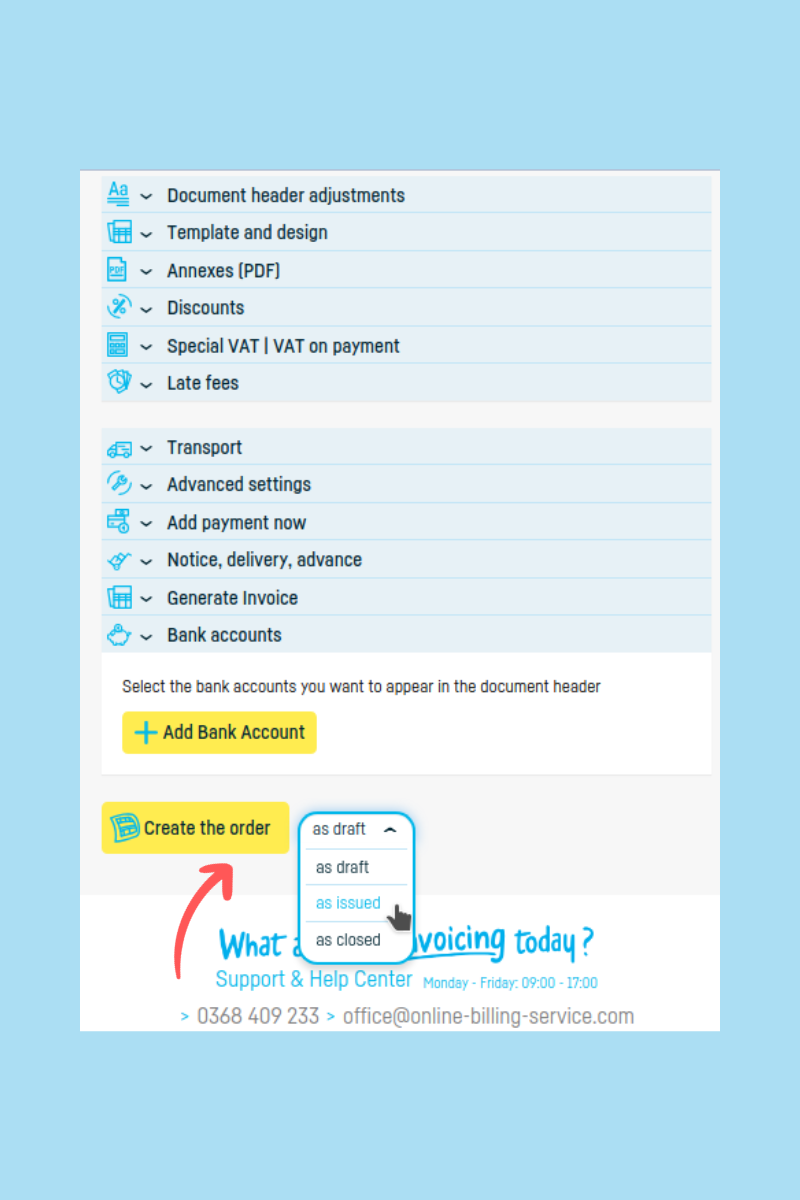
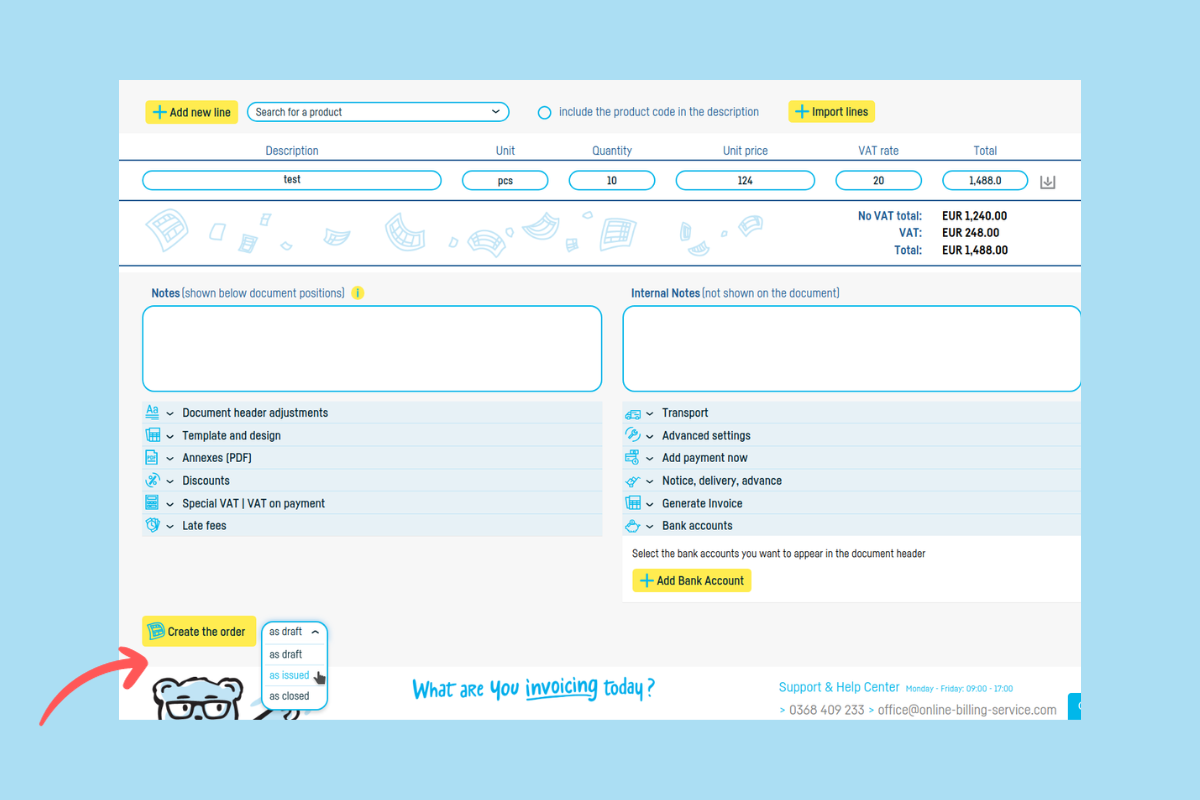
Step 7. Save document as Issued.
Other important information
– Your company's details are automatically filled in - learn here how to add a new client or import a list of clients from your computer.
– The document number will be automatically generated after you define a numbering scheme ( learn here how to define numbering schemes).
– You can describe the product or service by filling in the box, or you can add a product or service from the list of products on online-billing-service.com (learn here how to add a new product/service or import a list of products/services from your computer).
– If you select a product from the product list, then the unit of measurement and price will be automatically filled in.
– Learn here how to enter a discount.
– In the notes section, you can enter something like 'according to request no. X from DD.MM.YYYY.’
– Learn here how to set default values to further automate the document issuing process (i.e., information such as the expiration date, exchange rate, issuer, etc., will be generated automatically every time you add a document).
– After verifying that all information is correct, save the document as issued and send it to the customer via email or print it.
 Back to index


